Monday, August 16, 2010

peanut butter cup cupcakes

If you're a fan of peanut butter, I have a feeling you'll like these cupcakes... chocolate cupcakes with a peanut butter cup in the middle and peanut butter frosting! Decadent and delicious!

On Sunday we had our friends Emily, Adam and baby Harrison over for dinner, so I made pasta and a special treat for dessert. Everyone was a fan - and they've been enjoyed by a few others today, specifically my friend Maggie who I watched Bachelor Pad with this evening. What goes best with trashy T.V.?? Cupcakes and wine, of course!

The recipe I used is the same as the one used for my last post - Milky Way Cupcakes. The only difference is I used frozen peanut butter cups instead of milky ways. I did use a different icing recipe, which I've included below. Here is a look at my baking process, start to finish...


To start with, Reese's Peanut Butter Cups - the surprise in the middle of each cupcake!

Next up, the chocolate batter with a peanut butter cup in the middle...

The batter covers the peanut butter cup...
Chopping up peanut butter cups for decoration...
Right out of the oven...
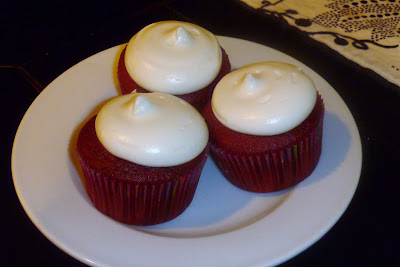
The finished product - complete with icing and peanut butter cup sprinkles...

Here is the recipe for the peanut butter buttercream icing:

Peanut Butter Buttercream Frosting
2 sticks unsalted butter, room temperature
1/2 cup shortening
1/3 cup creamy peanut butter (or more depending on the taste you're after)
1/4 cup milk (or less depending on the consistency you want)
2 teaspoons vanilla extract
1/4 teaspoon salt
1 1/2 pounds powdered sugar

1. Cream the butter and shortening in a stand mixer or a bowl with an electric mixer.
2. Add the peanut butter, vanilla extract and salt.
3. Slowly add the powdered sugar, approximately one cup at a time.
3. Slowly add the milk - add 1/4 or less depending on how thick you would like the frosting to be.
Enjoy!

Sunday, August 1, 2010

milky way cupcakes...

... also known as "Chocolate Magic." At least that's how they were described by one of the guys at yesterday's Royal's tailgate. He said this as he was eating his third cupcake, so I'm thinking he liked them. They were delish, and not hard to make! Here's the recipe - I got it from a blog I read, My Baking Addiction. I altered it slightly by using Milky Ways instead of Snickers, and I didn't use the package of pudding. Instead I used Pillsbury Devil's Food cake mix with a cup of pudding added to the mix. Enjoy - they're sure to go over well with chocolate and candy lovers!


Here's the recipe:

Cake:
1 package devil’s food cake mix with pudding
1 cup sour cream
1 cup vegetable oil
4 eggs; lightly beaten
1/2 cup warm water
1 teaspoon of vanilla
24-30 frozen Milky Way Miniatures

1. Preheat oven to 350 degrees F.
2. Line (2) 12 cup muffin tins with paper liners.
3. In a large bowl, mix together the cake, sour cream, oil, beaten eggs, vanilla and water.
4. Evenly divide the batter amongst the prepared pans.
5. Gently push a frozen Milky Way Miniature bar into the center of the batter and smooth the surface making sure to cover the candy bar with batter.
6. Bake for 15-20 minutes, or until top is springy to the touch and a wooden toothpick inserted comes out clean.
7. Cool cupcakes thoroughly on wire rack.

Caramel Frosting:
2 sticks unsalted butter; room temperature
1/2 cup shortening
2 teaspoons pure vanilla extract
1 1/2 pounds confectioners’ sugar
1/3 cup caramel topping; plus more for drizzling
1/4 teaspoon salt

1. Cream the butter and shortening in the bowl of an electric or stand mixer. Add the vanilla extract, salt and caramel syrup and combine well.
2. Begin adding in the sugar and mixing thoroughly after each addition. After all of the sugar has been added and mixed thoroughly, taste and decide if you want to add in more caramel syrup. For thicker frosting you can gradually add in a little more sugar.
Garnish with chopped Milky Way bars and a drizzle of caramel syrup.

Saturday, July 3, 2010

a 4th of July treat

Happy 4th of July to everyone! I know it's only the 3rd, but we're celebrating early this year! We're heading out to a friend's house later this afternoon for fireworks, food and fun. My hubby loves the 4th of July weekend because he can play with fire and blow up stuff... including watermelons! This morning I made chocolate cupcakes with buttercream icing. Pretty basic, but incredibly delicious! They're festively decorated in honor of the 4th.

Last Saturday, June 26, was my birthday. My family spoiled me with an awesome weekend and some fabulous gifts, including lots of cupcake and baking gear (I'll post pics in my next post)! My grandma and cousin Laura got me some cute cupcake liners - one for almost every holiday, including the 4th of July! I used the cupcake liners they got me, along with the fun star/stripes sprinkles. Here are a few pics:


The chocolate cupcake recipe came from one of my favorite cookbooks, Hello, Cupcake! Here it is:

Chocolate Cupcakes
1 3/4 cups all-purpose flour
1/4 cup unsweetened cocoa powder
3/4 tsp baking soda
1/2 tsp baking powder
1/2 tsp salt
1 1/2 sticks (12 Tbsp) unsalted butter, softened
3/4 cup light brown sugar, lightly packed
2 large eggs
2 oz. unsweetened chocolate, melted
1 cup buttermilk
1 tsp vanilla extract

1. Preheat over to 350. Line muffin tins with paper liners.
2. Whisk together the flour, cocoa powder, baking soda, baking powder, and salt in a medium bowl. In another medium bowl, with an electric mixer on high, beat the butter and sugar until light and fluffy, about 3 minutes.
3. Add the eggs, one at a time, beating well after each addition. Beat in the melted chocolate. Reduce the speed to low and add the flour mixture alternately with the buttermilk in batches, begining and ending with the flour mixture and beating just until blended. Stir in the vanilla.
4. Bake until golden and a toothpick inserted in te center comes out clean, 15 to 20 minutes. Remove the cupcakes from the baking pan, place on wire rack, and allow to cool completely.

For the icing I used Wilton's buttercream icing recipe.

I hope everyone has a fun and safe 4th of July!

Monday, May 31, 2010

cupcakes in San Francisco - That Takes the Cake

Last week Brett and I went to San Francisco for a friend's wedding. The wedding was on a Sunday so we arrived a few days prior to allow time for sightseeing, shopping and eating! While reading up on where to visit and eat in San Francisco, I read about That Takes the Cake, a cute cupcake shop located on Union Street. During our visit I made sure we stopped by to sample a cupcake from the cute little shop. Brett and I split an Opposites Attract Cupcake (chocolate with peanut butter frosting). I must say, it was delicious!


red velvet cupcakes and a cute cupcake apron... as seen on Sex and the City 2!

That's it, I've decided... red velvet is my favorite cupcake flavor. I LOVE red velvet cupcakes, especially when they're paired with cream cheese frosting! It's also my favorite flavor to make - not only because I love the taste, but they always turn out perfect and beautiful!

This past Friday I went to a friend's birthday soiree which involved drinks and appetizers, followed by a viewing of Sex and the City 2! It was a fabulous girl's night, and I think the birthday girl had a wonderful time. In honor of the birthday girl, I made my favorite cupcake, red velvet! From what I observed and later heard, they went over well. It was a great pre-movie treat!

Red Velvet Cupcakes with Cream Cheese Frosting


Since I had just returned from a week long vacation, I took the easy route and made the cupcakes using the never fail Perfect Cake-Mix Cupcake Recipe. Basically, it's an adaptation of a box mix.

Here's the cream cheese frosting recipe - for a typical batch of cupakes (approximately 28 cupcakes), I double the recipe and usually have a bit leftover to freeze.

Cream Cheese Frosting
*Makes 3 1/4 cups
1 pkg (8 oz) cream cheese, softened (tip - don't use fat-free or lowfat cream cheese, the frosting won't be thick enough)
1 stick (8 Tbsps) unsalted butter, softened
1 box (16 oz) powdered sugar
2-3 Tbsp milk
1 tsp vanilla extract

1. Combine the cream cheese and the butter in a medium bowl. Beat with an electric mixer until light and fluffy, about three minutes.
2. Gradually add the powdered sugar and two tablespoons of the milk and beat until smooth. Add the vanilla extract, and the remainin one tablespoon milk if the mixture is too thick.

One more tip... put one tablespoon of milk in when you're mixing the powdered sugar. Wait to put the remainder of the milk in toward the end, sometimes you don't need more than one tablespoon of milk. It all depends on the consistency you're trying to achieve. When using an icing tip to decorate, the thicker the better.

Cupcake Apron - as seen on Sex and the City 2!
During SATC2 I got excited when I saw Charlotte making cupcakes and wearing this super cute apron I recently spotted at Paper-Source. How cute is this apron? In the movie, Charlotte's daughter Lilly is wearing the children's version.


Love it... I think I need one! The apron retails for $30 and is available from Unique-Vintage.com. It's also available at Paper-Source, but for $34.95. On iVillage Food I found this article, which provides you with a discount code for a 20 percent discount on the apron if bought from Unique-Vintage. The offer is good through June 15.

Monday, May 10, 2010

happy mother's day

In honor of Mother's Day my dad grilled steaks and shrimp for my mom. We had a wonderful dinner and I contributed by making a delicious chocolate raspberry cheesecake. I also made a salad, but it paled in comparison to the cheesecake, and the rest of the dinner! The cheesecake recipe is from my Aunt Bonnie, who is an amazing cook and baker. I've used many of her recipes before, but this is one of the few that turned out like Aunt Bonnie's version - so I was extremely excited. She gave me the cheesecake recipe, and many other recipes, as a wedding gift. Actually, her recipes are a chapter in Kitchen Klutter, a book of recipes my mom's best friend put together for me. I think there are 100+ recipes in that book, and I've barely broken the surface. So, shout out to Ann for compiling all the wonderful recipes, and to Aunt Bonnie for the fantastic cheesecake recipe! Here it is:


Chocolate Raspberry Cheesecake
Chocolate wafers, finely crushed (about 1 1/2 cups)
1 1/2 cups light cream cheese
1 cup sugar
1 cup low-fat cottage cheese (processed in a food processor until smooth, this is an important step to get a creamy cheesecake)
1/4 cup plus 2 Tbsp unsweetened cocoa
1/4 cup flour
1/4 cup raspberry syrup or raspberry liquor
1 tsp vanilla
1/4 tsp salt
1 egg
Fresh raspberries

Sprinkle chocolate wafers in the bottom of an 8" spring form pan. In a food processor mix the cream cheese and next seven ingredients until smooth. Add egg and process until just blended. Slowly pour over crumbs in spring form pan. Bake at 300 for 45-50 minutes until set. Turn off oven and prop oven door open with a wooden spoon. Let cool in oven (this will keep your cheesecake from cracking - I let it cool for about 45 min). Cover and chill for at least eight hours. Remove the sides of the pan and garnish with fresh raspberries.

I paired the cheesecake with a raspberry sauce, which was excellent and brought out the raspberry flavor.

Raspberry Sauce
One package fresh raspberries
1/4 cup sugar
3/4 tsp cornstarch
2 Tbsp water

Press raspberries lightly in sieve over bowl to extract juice. Transfer juice to small pot; add sugar and cook over medium-high heat until hot, about three minutes. Meanwhile, mix cornstarch with water until combined. When raspberry mixture is hot, slowly whisk in cornstarch mixture. Bring to boil and cook two minutes, or until slightly thickened. Chill well.

Here's my Kitchen Klutter cookbook... such a great gift and cookbook! Thank you Ann!!


pretty in pink

I recently made cupcakes for a friend of mine who was hosting a bridal shower. I made two different types of cupcakes: white cake with buttercream frosting and strawberry cake with cream cheese frosting. The bride's colors are pink and silver, so I used two different shades of pink for the frosting - light pink for the cream cheese and bright pink for the buttercream. I sprinkled both sets with silver glittery sprinkles. Here are a few pictures: